June 14, 2018
In the screen-printing business, everyone seems to be battling for the same customers. But what if you could add new business that your competition isn’t getting?
Fashionable childrenswear is becoming popular in apparel boutiques throughout the country. These garments include T-shirts, hoodies and even dresses for girls. New business in kidswear starts with a clear vision of the end product and a smart strategy of how to market these garments both online and at the retail level.
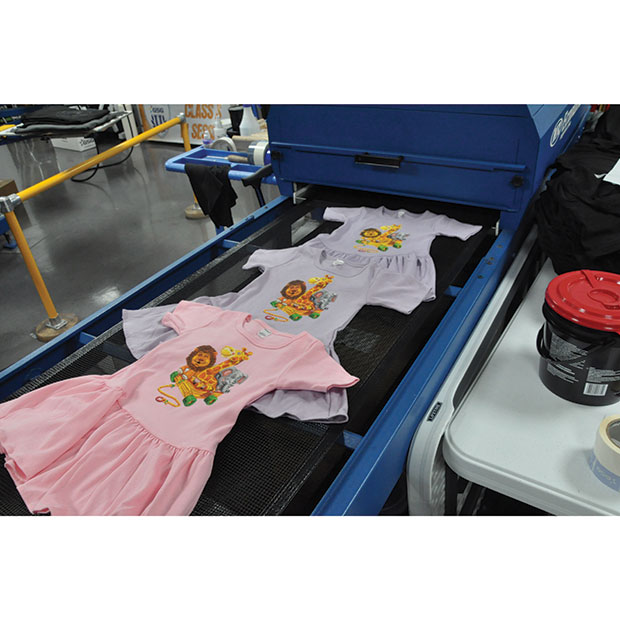
Following is a step-by-step look at screen printing a simulated process
design on a youth dress from start to finish. It was printed by Mark Suhadolnik, a screen-printing expert at Graphic Solutions Group (GSG), Dallas, in the company’s print lab. The process included screen preparation, film output, screen making, ink selection and setting up the press.
From the Top
Simulated process printing has its name because it mimics the look of true four-color process printing, which involves transparent CYMK process inks (cyan, yellow, magenta and black.) Four-color process printing breaks the design down into halftone color separations using only four screens to achieve a multitude of colors.
Simulated process printing, on the other hand, uses opaque inks instead of transparent process inks and requires more screens to achieve a full-color print. For example, to achieve secondary and tertiary colors with four-color process printing, combinations of the primary colors are printed on top of each other. But in simulated process printing, secondary and tertiary colors are printed directly through separate screens.
More screens are needed with simulated process printing, since a white underbase and secondary colors, such as green, orange and purple, are being printed with red, blue and yellow primary colors, plus a highlight white. This explains why a 12- or 14-color press is needed to print some intricate simulated process designs. But this kind of printing enables mass production of photorealistic designs on dark garments, such as concert and biker tees, fashion apparel and more.
The Artwork
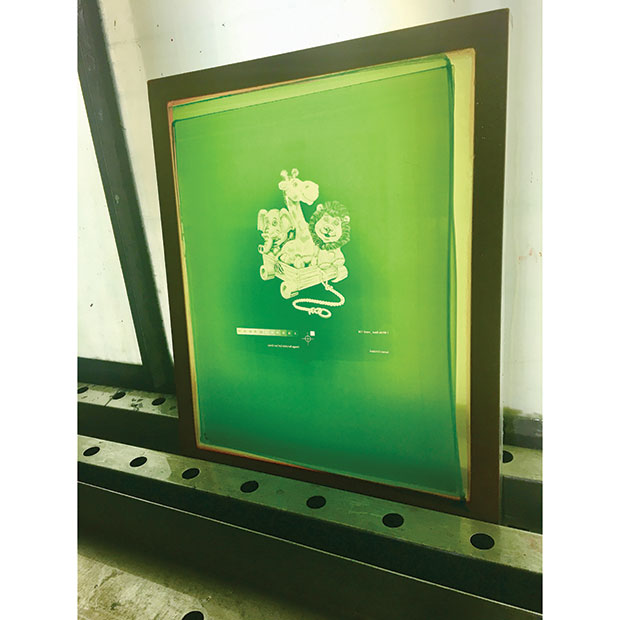
For the dress, Dane Clement of Great Dane Graphics provided a design — stuffed animals in a wagon — from his online stock clip-art collection. These designs already were color separated for simulated process printing.
Art is the key to most popular garment lines, and most fashion printers have in-house artists to design fashion apparel. According to Clement, any shop’s new artist should spend time on the production floor exposing screens and washing them out. Not only should he be present when screens are set up on the press, but he also should watch the entire printing process to learn all the steps and see how everything works together.
Clement also recommends using Separation Studio to preview art to see how it will look on a black background; if it looks good on black, it will look good on all colors.
For this project, art was sized at 7 inches and a film positive was printed. The size was too small for the dress, so Suhadolnik resized it to 9 inches, then printed all six films. The dot size for this design is a 55-line elliptical with the dot angles set to 61 degrees.
Clement designed this artwork to first print a white underbase and flash, then print all the colors — wet-on-wet — on top. “Printing wet-on-wet colors on top of the white underbase helps mix the colors on press for more true color reproduction,” he says.
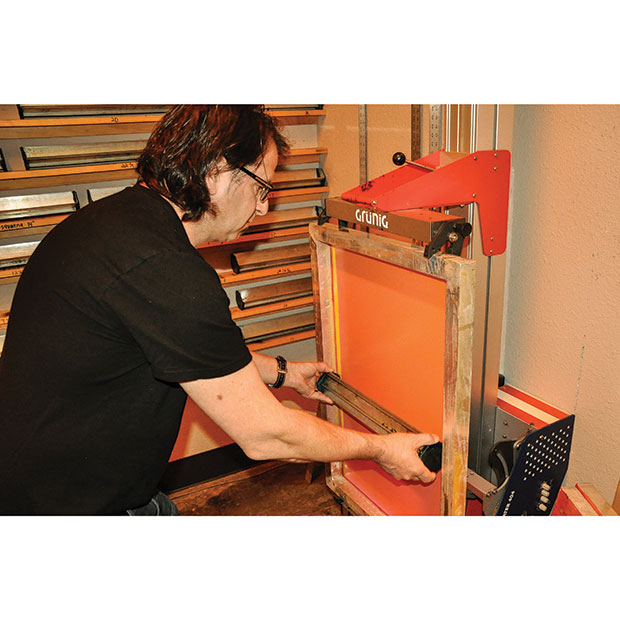
Screen Selection
The screens contained aluminum frames and yellow 305 mesh stretched to 25 N/cm, and were coated with Ulano Poly Plus S with a one-on-one coating technique using the scoop coater’s dull side. Yellow mesh is ideal for halftone printing to reduce the amount of light scatter that causes undercutting during the screen-exposure process.
Screen printing on fashion garments requires a different thought process for mesh selection compared to traditional T-shirt printing. For screen printing everyday vector art, 110-230 mesh counts will handle most design requirements. But for fashion printing, higher mesh counts in the 305 to 355 range commonly are used to achieve the softest hand print and to enhance the fabric’s drape.
The screens had a stencil thickness of 20% emulsion over mesh (EOM) and were measured with a stencil-thickness gauge. This factor is critical to ensure that the correct amount of ink is deposited onto the garment’s surface.
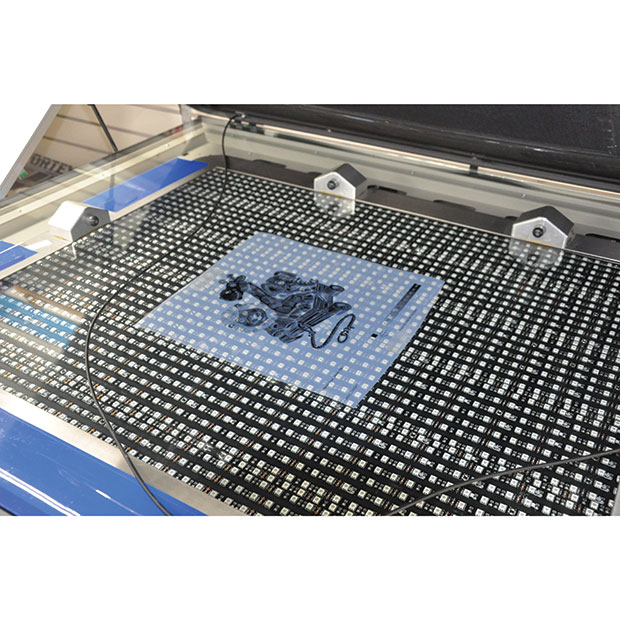
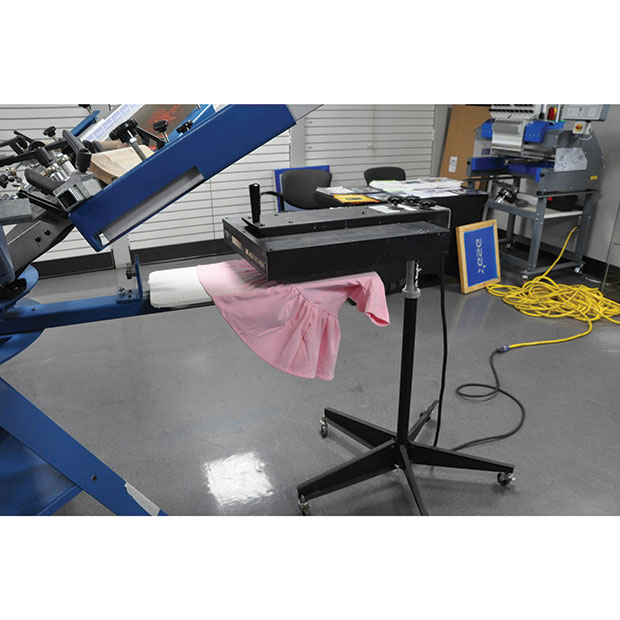
Film Output, Exposure & Setup
The film separations were printed onto roll polyester film with an Epson SureColor T3270 and pre-aligned on the screens with the M&R Tri-Loc system. They were exposed for 50 seconds on the M&R Starlight LED exposure unit and washed out with water in a back-lit washout booth.
Good pre-press equipment is critical to achieving top-quality screens quickly and accurately. Raster Image Processor (RIP) software is needed to translate the halftones in the art files to the Epson printer. We used AccuRIP software to output the art files sent by Great Dane Graphics.
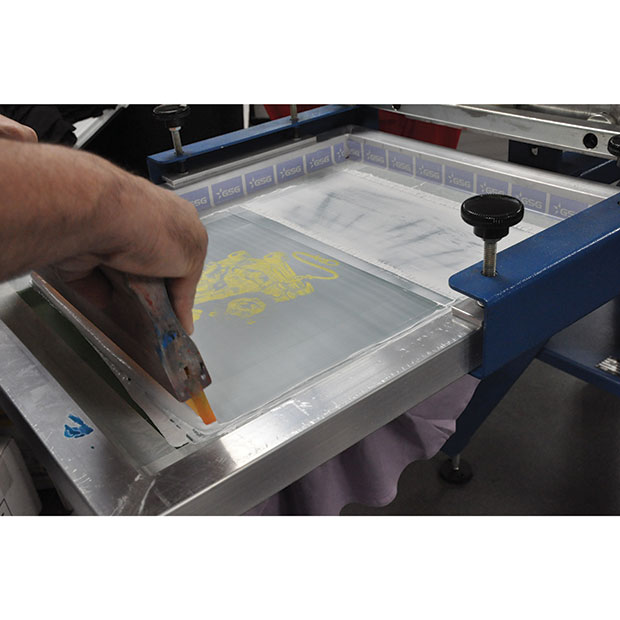
All six screens were loaded on the M&R Kruzer manual screen-printing press, taped and registered in less than eight minutes. The M&R Tri-Loc system was used to pre-align the images in the same location on each screen prior to exposing.
Ink Selection
The three main ink systems used in fashion printing are plastisol, discharge and water-based inks. Today’s plastisols are easy to print through fine meshes, resulting in a soft-hand print. Additives also can be mixed with plastisols to achieve a feel that mimics the softness of water-based inks.
Water-based and discharge inks are great for printing on fashion garments, but it’s important to have the right equipment. Requirements include a forced-hot-air textile dryer, water-resistant stencil chemistry and a basic understanding of printing with water-based inks so they won’t dry in the screen during production. Today’s water-based inks are much easier to use than those from 10 years ago.
For the print on this cotton dress, Wilflex Epic plastisol and GSG’s Vortex plastisol inks were used. A soft-hand additive was not needed since the 305 mesh alone provided the desired feel.
It’s important to periodically use a “donut” thermal probe to check the printed ink’s temperature as it passes through the dryer. The curing temperature for standard plastisol ink is 320˚F. Always follow your ink manufacturer’s recommended cure temperature for the product you are using.
Here’s how to use a donut thermal probe: Print a design on a swatch of test material with standard plastisol ink and press the probe’s crosshairs into the wet ink deposit. Run the fabric through the entire length of the oven to allow the ink-film temperature reading to reach 320˚F. If the temperature doesn’t reach 320˚F, increase the oven’s temperature or slow down the conveyor belt until a reading of 320˚ F is achieved.
Simulated process printing can be easy when you have great artwork, printing equipment and use steps similar to the following:
James Ortolani has more than 30 years of experience in the decorated apparel industry, specializing in hands-on, direct screen printing and heat-transfer production. He currently works for PolyOne Corp. For more information or to comment on this article, email James at james.ortolani@polyone.com.
April 5, 2024 | Process + Techniques
Why do we often struggle with some of the seemingly simplest things, like slathering screen-printing ink onto a decorated-apparel garment. Slathering so that it looks clean, bright, opaque and altogether attractive.
FULL STORY
March 13, 2024 | Process + Techniques
Wouldn’t it be wonderful if there was a secret formula for designing a best-selling T-shirt for a sports team, a business or for your own pre-print line?
FULL STORY
January 25, 2024 | Process + Techniques
As is the case with any craft, when it comes to screen-printing T-shirts and other apparel the devil is in the details. The best art, the best press in the world will inevitably come up short if you don’t take care of the little things as well.
FULL STORY