May 17, 2016
For many screen printers, the thought of drawing a design isn’t appealing. In fact, a lot of experienced artists either don’t draw well or wish their drawing skills were better.
The ability to draw an attractive picture, however, is not necessary to accomplish a production art task. In fact, if the right process is followed, it takes little skill — only patience and careful application.
The first and most important thing is to start with the right tools. It has been said that drawing with a mouse is like trying to draw with a bar of soap. Not only is the hand in the wrong position, but the software doesn’t really provide a level of sensitivity for the mouse.
A stylus is the right tool to use when trying to redraw an object. There are many styles of pen tools available, but they all are not made the same. The best pressure-sensitive pens don’t have wires hanging off of them and they are weighted properly. Wacom is the most popular brand that dominates the art market (see Figure 1).
Buying a new or used pen doesn’t have to break the bank, either. For the average shop, a small 4″ x 6″ tablet is satisfactory for most jobs. Just make sure the pen works with the latest version of graphic design software you are using.
Once you have a pressure-sensitive pen installed on your computer and you want to start drawing, use software that allows you to access its pressure features. Many pens also have different features available like Tilt, and other styles of use (like an “eraser” function on the back side) that you may have to program into your software.
This is where patience is necessary because you cannot immediately start drawing. You must set up the software first, practice different pen strokes and develop a working process before you can start seeing results.
The learning curve isn’t long with a pen stylus, though, and you can be working on a job in just a few minutes.
It is important, however, that you have a process in mind so that you don’t “draw yourself in a corner” by working in a way that makes your project even more difficult to separate or edit colors later in the process.
A Workable Stylus Method
Figure 2 is an example of a graphic that could be reproduced many different ways. The reasons you may want to redraw complex objects like this one instead of finding other workarounds include:
1. A redrawn object will have a cleaner edge that will trace into a vector seamlessly.
2. The thought that a filter or a “mouse-clicked” re-creation is faster is often not true at all. Sometimes a file that is complex will not be good enough when squeezed through a filter and will need to be redone. Or worse, the entire job may be produced with poor-quality artwork and the shirts will be rejected. Another possibility is that the tweaked version may require lots of sharpening and, by the end, it would have taken the same amount of time to redraw it for a far better result.
3. The skills that are exercised when redrawing an object will foster abilities that can allow for original creations or clip-art manipulations that will continually “wow” your clients beyond the standard layouts.
In this example job, the file was reproduced using a pen stylus inside Adobe Photoshop. The first step is to import the file into Photoshop and adjust it to the actual print size at 300 dpi. A common mistake is to leave a file too small in size or at a low resolution, resulting in rough, pixelated edges in the final drawing.
Once the design is imported into Photoshop, the pen tablet is tested on an extra layer to set its drawing style to work with the necessary edge quality required. To make these adjustments, the Brush dialog box is activated and the “Shape Dynamics” feature is enabled, which allows the pressure that is sensed by the software from the pen to change the size of the outline to be thick or thin. Light pressure results in a thin line that gets thicker as the pressure increases.
The edge quality of the line created by the pen tool is set in the Brush menu’s Hardness dialog box. This creates a clean line to redraw the outline in the image. The foreground color is set to black using the “D” quick-key command.
After practicing on an extra layer with pen strokes, the pen outline’s size is adjusted using the bracket keys (the right bracket key enlarges the line and the left one shrinks it). The practice layer is then deleted.
The first step in drawing to re-create a design in Photoshop is to create a white background layer below the object.
After this is done, the layer that holds the object to be drawn is reduced in opacity to 30% or 40%, so it is faded, but still visible. Next, an extra layer is created above it so the drawing can begin.
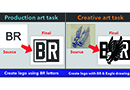
Depending on your needs, an additional layer could be used for a more creative task, where some elements would need to be repositioned in rough form and then refined in the top layer. In this case, the design could just be revised with a single layer (see Figure 3).
In the case of a clean-lined cartoon (like the outline example) it is better to have a defined and practiced process of drawing, moving and saving the work. This avoids having large areas of the drawing that may get damaged if a mistake is made.
The following process was used to create the best balance between sketching, moving the drawing surface and saving the work.
1. A line is carved on the outside edge of the best outline in the image. The practice is that the outline is the edge-quality area and any inside lines could be left rougher. This was because they would disappear when the final shapes were selected later. Drawing in this way saved a lot of time as opposed to trying to fill in all of the black areas with color.
2. Special attention is paid to the zoom depth while drawing. If the image is zoomed too far in, little progress is made and it is too hard to draw areas that rely on the picture as a whole. Too far away, and the line quality would become too rough looking and it is hard to make smooth lines.
3. Several quick-key combinations are essential while drawing. The bracket keys allow enlarging and shrinking of line size while drawing. The space bar allows the cursor to turn into a hand and move the image along while drawing so that the process can be smooth and uninterrupted for navigation. The most important is the Undo (Command-Z) combination that erases a bad stroke or two along the way. Also essential is the Save quick key (Command-S) that should be used after each area is completed.
Once the whole outline is finished, the image can be saved and exported, then imported into vector graphic software like CorelDRAW or Adobe Illustrator, and traced. In this case, it was brought back into CorelDRAW and traced so that colors could be put into the final design (see Figure 4).
The process of drawing on a computer isn’t difficult if the right tools are used in combination with patience, practice and a defined method. With moderate drawing skills, all but the most complex jobs can be rapidly prepared for screen printing without sending them out for costly, or sometimes poorly done, re-creation.
Thomas Trimingham has been working in screen printing for more than 25 years as an industry consultant, freelance artist and high-end separator. To comment on this article, contact Thomas through his educational website, screenprintingartist.com.
April 27, 2023 | Graphics + Design
When it comes to creating a design layout for a hat, hoodie or T-shirt, there are some basic concepts it’s important to keep in mind to create a design that’s pleasing to the eye, catches your attention and draws you in. One of these concepts is focal point.
FULL STORY
May 18, 2022 | Graphics + Design
According to Erik Cartmill, president of Cornerstone Impressions, Fort Worth, Texas, his business operates on the following philosophy: “Where there’s a Bill, there’s a way.”
FULL STORY
March 3, 2022 | Graphics + Design
“But I’m not an artist!” the screen printer said on the phone for the second time. He had agreed to do some work for his best customer, with a last-minute request for artwork help.
FULL STORY