October 6, 2017
Let’s say you just finished an embroidery job — a left-chest logo stitched on shirts and hats — and now the customer wants jackets. What’s more, he wants the same logo on a jacket back.
As it stands, the logo measures 3.5 inches wide, but now must be 17 inches wide. To top it all off, the customer wants the finished jacket “yesterday.”
If you anticipated such an upsell, you will be fine. If not, you may have to redigitize the logo because it can’t be enlarged without distortion, overly long stitches and loss of quality. You must change stitch types — column stitches must become fills, run stitches must become columns and fills will need additional underlays and pull compensation.
Changing Stitch Types & Lengths
The easiest thing to do is initially digitize your designs so that they can instantly be adjusted to meet any need or size requirement. If you have not digitized expecting an upsell, running stitches — used as an outline — must be changed to column stitches. Most embroidery software includes automatic features that will allow you to click on a group of stitches and change them to suit a larger design. Then, you can widen or shrink that column to fit. Make sure any underlying fill has an edge-run underlay, and remember that the column stitches must be offset enough to catch the underlay so that the new outline does not pull away.
In resizing a design to be embroidered on a jacket back, the existing column stitches in the smaller version must be longer in the larger version. But if they are too long, such stitches easily can be changed to fills and can glisten just like a traditional column stitch; the secret is stitch length. Long stitches that would pull in a larger column-stitch letter can be used in the fill and be stable.
The arbitrary needle penetrations allow you to use longer stitches to create the sheen you need without the stitches pulling out, and that sheen will follow the contour of the letters. So for the larger columns created by scaling up the design, think fill rather than split satin stitches.
Adjusting Underlay
Background fills, when programmed the traditional way, will be distorted when you increase the design’s size unless you add underlay and address the additional pull compensation. The longer stitch in the resized fill will pull more than the shorter one in the original fill or tatami stitch.
Additional underlay must be used, usually a double tatami that is set 90 degrees unto itself, to form a lattice that holds the fill in place and prevents it from pulling away from any outline or other object in the design. The fill still must be enlarged to compensate for the pull that occurs because of its traditional settings.
If, on the other hand, you program a layered fill from the beginning, there will be no need for the additional underlay — or any compensation — because there will be no pull. This will lower your stitch count by about 30%, and save you the frustration of thread breaks and a cardboard-like appearance.
To do a layered fill, simply reduce the stitches to 1⁄3 of the density, or the amount used in the first underlay. To reach that exact density setting, determine the number of stitches that a full density fill or tatami object contains. For example, if it contains 15,000 stitches, the layered fill should contain 5,000 stitches. Upon reducing the stitch count, remember the density setting for future use.
Digitize the background fill using the new density setting. Make sure the stitch angle is zero, or horizontal. The object should start at the top and end at the bottom. Then, duplicate that object twice. Alternate the start and stop positions in the second layer by starting at the bottom and stopping at the top, then add an edge-run underlay to that layer. The final layer will start where the second layer ended — at the top — and end at the bottom.
If there is an outline on this fill, add an edge-run underlay to the second layer and offset the column stitch outline so that it overlaps the fill’s underlay. This will prevent the outline from pulling away from the fill.
This layered fill will run beautifully with no thread breaks, and can be increased or decreased in size as needed. It also will result in a fill that moves with the jacket, easily accepts detail and doesn’t cause any push or pull. Furthermore, because there is no need for compensation, there also will be no distortion.
Texture Adds Interest
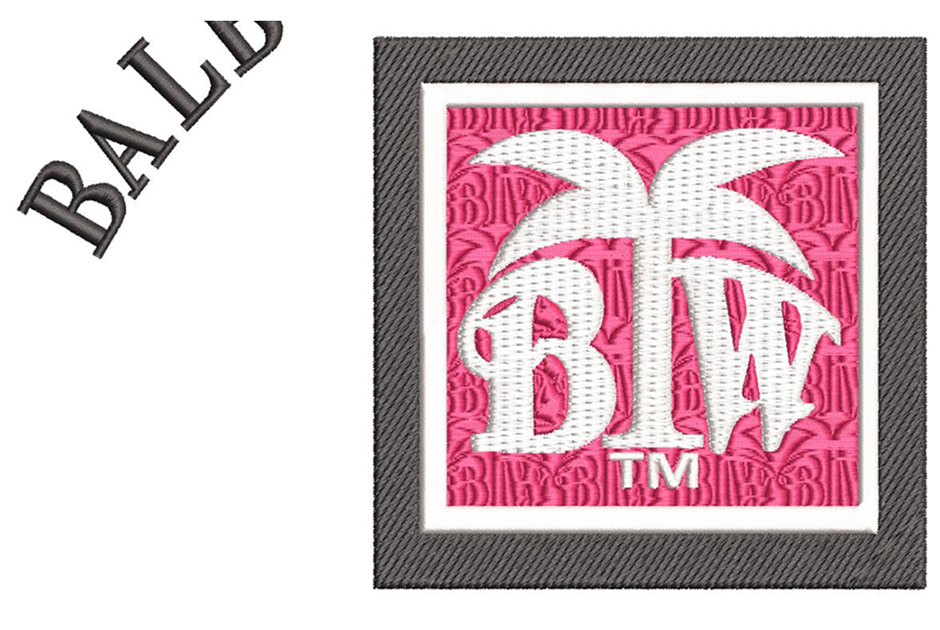
When working with a larger design, certain elements can be added to spark interest. The background fill does not have to be plain; rather, it can be an embossed version of your client’s logo. If you do this, add texture only to the last of the three layers. These extras can add appeal to your designs that brings your customers back.
The last layer of the fill is what your eye will see, so that’s where you can add either a longer stitch for gloss, a shorter stitch for a matte finish, a patterned fill with your customer’s embossed logo or any other appropriate texture.
Easily adjusting a design’s size will enable you to upsell jobs more effectively. Taking advantage of the jackets now available on the market will increase your shop’s bottom line. Starting with a layered fill will make it easier to move from size to size and garment to garment.
Knowing that the layered fill is an option means you can use the original fill from the smaller designs, reduce its density, duplicate it three times, change the starting and stopping positions on the second layer, and instantly avoid the problems related to additional underlay and pull compensation.
These easy steps will ensure you can take advantage of the smaller designs you may have previously stitched, while adding to your shop’s bottom line with a jacket to match. Digitized correctly, such designs will be a pleasure to embroider and even can be your main marketing tool for attracting more customers.
Lee Caroselli-Barnes, owner of Balboa Threadworks Embroidery Design, is known for her innovation and excellence in embroidery digitizing. She has more than 30 years of experience in the embroidery industry. For more information or to comment on this article, email Lee at balboainfo@aol.com.
Stabilizing and Hooping Jackets
Before starting any job, it is important to pick the correct stabilizer. Fortunately, the choices are simple when it comes to jackets. For lightweight jackets, like wind breakers and those made of nylon, a sheet of tearaway stabilizer should be sufficient. For thicker jackets, little or no stabilizer may be needed.
The key is how much an item stretches. Thick jackets have little stretch and so much lining that adding another layer won’t really help. If you’re worried about distortion, placing a piece of tearaway stabilizer behind it should be more than sufficient. A cutaway stabilizer would be needed only if you’re embroidering stretchy knit jackets.
Hooping jackets, particularly thick ones, always is a challenge. They are bigger than a normal-size garment. Often, embroiderers don’t have a template for the framing board to fit the back hoop size and there are not many references for you to know whether the jacket is hooped straight.
If you embroider many jackets, purchase or make a framing template for your framing board, or have a table that is suitable for hooping these larger items. It doesn’t have to be fancy, but it should allow you to apply more downward pressure when hooping thick jackets. — Impressions archives
Jacket Alignment
The point of using a hooping device is to assist in getting things aligned consistently from piece to piece. Jackets can be tricky when it comes to alignment, especially when they don’t have many marks or seams.
Center seams make for easy alignment, and many jackets have a seam near the shoulders, which makes a straight line to reference. Just ensure the design stays below that shoulder seam for
proper alignment.
If there are no seams or other reference marks, mark where you want the center of the design to be. Placement guides say to embroider the design 7-10 inches down from the neck. This depends on its size and the style of the jacket.
You always can reference the sleeves and the bottom of the jacket, too. Line up the clips on the hoop with the sleeves to help straighten the design. Then, measure from each side of the hoop to the bottom of the jacket to ensure it is even. You can use the tab on the hoop where the metal clips are screwed on for the reference point on each side. — Impressions archives
July 28, 2023 | Design + Digitizing
Very few things in life stand the test of time. As natural as the ebb and flow of evolution, most seemingly universal customs are founded and practiced with vigor, only to fade away with a whisper as the years tick by.
FULL STORY
August 16, 2022 | Design + Digitizing
With this month’s On Design, we travel deep into the jungles of Central Mexico, harkening back to an ancient time where the Aztecs roamed the earth whilst building a formidable empire.
FULL STORY


