In the world of digital printing (direct-to-garment, transfers, sublimation) there is a lot of emphasis placed on ink costs, yet they account for a very small percentage of production costs.
It’s hard not to direct your attention to ink prices — especially when you’re forking out several hundred dollars at a time on replacement inks. But are you looking at things all wrong?
I frequently get into discussions with business owners who are focused on determining a cost per milliliter of ink and then translating that to area coverage for different print items. From an engineering standpoint, that sounds logical, but in reality it’s like trying to figure out how much thread and backing go into an embroidery job. The material cost is immaterial.
For one thing, with digital printing you consume a certain percentage of ink for non-revenue tasks, such as samples, testing, mistakes, head cleaning, etc. If you tried to assign the cost of ink used on a specific job to that job, you would never recapture your total ink costs. Thus, ink costs should be considered a regular part of your business operating expenses that will vary based on production demand. Let’s look at an example.
TIME IS MONEY Assume you are a full-time digital printing shop (we will use sublimation for our discussions, but the same concepts apply to direct-to-garment and digital transfers) and you have calculated your hourly cost of operation to be $30.00 (your operational costs should be based on all expenses incurred over the course of one year including your desired paycheck). If it took 2 minutes on average to print and press something, you could theoretically produce 30 items per hour, which works out to $1.00 each. But just like the embroidery example, you are going to have downtime associated with setup and post-production tasks, so in the case of single-piece orders you might be spending more time engaging in those tasks than in the true production process. If it took you 20 minutes on average to process something, the cost is going to be $10.00.
As an example, let’s say that you were using a printer that has an average media cost of 60 cents for an 8” x 10” area — potentially a full front design on a T-shirt. If you were able to cut your ink costs by 50% it would save 30 cents in production costs — hardly a make-or-break scenario. On the other hand, if you could improve your efficiency in terms of setup and post-production time by 50% (based on the scenario above) it would save $5.00 in production costs. The end result is more pieces per hour and a lower cost per piece.
It should also be noted for sublimation, that with smaller pieces, such as coasters, name badges, dog tags, etc., you can print and press multiple pieces at the same time, which further increases your efficiency. And because of the smaller image size, your ink costs may well drop below 15 cents per piece.
There are lots of angles you can take here, but my point is that the cost to produce something is based on how many units you can produce in a given time period against the operational costs assigned to that same period of time. The material cost (not the cost of the blank) is just a percentage of all of your operational costs, which have to be accounted for in your production numbers. In reality, material costs may be irrelevant when you look at the big picture.
Understanding what things cost is one thing, figuring out how to calculate your operational costs and then create a price structure that makes sense is another thing.
DEVELOPING A STRATEGY The first element of a profitable price strategy is the most important: cost. If you don’t know what it costs to operate your business, then it’s highly unlikely that you can create a pricing system that works. There are many costs to running a business in addition to ink, and these expenses must be factored into your pricing system in order to recoup them and make a profit. Thus, you must start the process of pricing with a focused cost analysis strategy.
Step 1: Determine Operational Costs First, identify and add up all of the projected costs for operating your business for one year. Keep in mind that some costs are fixed, while others may change as your business grows (you should put everything in a spreadsheet so that you can constantly update as your business changes). Also, costs such as merchandise for resale will be recovered in the sales process; so don’t include them here, unless you are entering into a payment plan for purchasing such merchandise.
In addition, be sure to include your desired paycheck. The final result will be the total estimated dollars that you need to pay all of your yearly bills plus your paycheck. But always keep in mind that there will be fluctuations and unexpected costs, so don’t assume this number is carved in stone. But it is a reasonable starting point for your cost analysis.
Step 2: Break Down the Costs Into Usable Increments Taking the information gathered in the initial assessment phase, you should now have an approximate figure for the annual cost of operation. Suppose that number was $60,000. What does that tell you? Pretty much nothing at all, so you need to break this number down into something that is easier to deal with.
Decide how many weeks you plan to operate your business per year. Most people go with 48 initially, as this equals two weeks of vacation and 10 business holidays. Divide $60,000 by 48 and you come up with $1,250, which is your weekly cost of operation. Said another way, you need to bring in at least this amount of money in net dollars each week, 48 weeks per year, in order to reach your yearly number. Divide this number by five to see what the daily figure is ($250) and by 40 to determine the hourly figure ($31.25).
You now can see quite realistically what it costs to run your business on a daily basis. This information will make it easier to track the performance as well, because you essentially have a series of production goals that must be met in order to generate the required amount of annual revenue needed to pay the bills and yourself.
Step 3: Compare Production Against Costs Once you have usable operating cost figures, then it’s time to compare them against your “logical” production capabilities in order to see what it really costs to generate sublimated images.
Unlike many other decoration processes, sublimation is pretty constant in terms of production time. Regardless of the size of an image, the pressing time remains the same — about 1 minute for most applications. Printing time can vary with the size of the image and with the printer being used, but in the case of some systems like the Ricoh, printing time rarely exceeds 30 seconds for anything.
For simplicity, assume that it take 30 seconds to print, 30 seconds to prepare substrate for press and 60 seconds to press per item. That works out to 2 minutes. Thus, within reason, you have a maximum output potential of 30 pieces per hour.
If your hourly cost of operation is $31.25 (calculated earlier) and your potential maximum production is 30 pieces per hour, then a quick bit of math reveals your cost per item to produce is $1.04. That includes ink, paper, labor, insurance, utilities, etc. In fact, the only thing it doesn’t include is the cost of the substrate and of course a sizable markup.
If you play with the figures, you also will see, that if you increase your production output per hour against the same overhead, you will reduce the cost per item. And if you go the other way, you will of course see the numbers increase. It’s important to understand this concept, as different variables in different jobs will affect the cost of the item being produced.
For example, if you are sublimating coasters, you can usually print out five images on one sheet of 8 ½” x 11” paper and press five coasters at once as a result. Thus you are producing five items per cycle instead of one. In theory, that would yield 30 cycles/hour multiplied by five items/cycle or 150 pieces per hour. Now, the production cost is 21 cents per coaster (not including substrate).
But of course that is just numbers on paper. If you think it through, there will be more prep time for setting up five coasters to press than for setting up one, because you need to tape each one into place on the transfer then flip it upside down and place on the press without shifting — more like a minute (or more) than 30 seconds for prep time. But if you take the time to play with numbers and variables, you can start to generate some pretty decent base figures for pricing.
So far your numbers assume you are running your equipment non-stop, all day long, but that will not be the case. Every job requires setup and finishing, which means pre- and post-production downtime. In fact, these production downtimes can be higher than the actual production time when dealing with small orders.
For example, let’s say you have to produce 12 plaques, each taking about 2 minutes to print and press for a total production time of 24 minutes. However, you need to do some logo work, which will take another 15 minutes. And at the end of the production cycle you will need to wrap and box the plaques, something that will take about 15 minutes. Now your total job time is 54 minutes, which can be rounded off to 60 minutes. So the reality is that you produced, beginning to end, 12 items in 1 hour. At an hourly cost of $31.25, each plaque cost $2.60 to produce when you add in the pre- and post-production times.
The end result here is that you must be sure you are covering the true job costs when using any pricing scheme. In addition, you will have to add in the cost of the substrate, shipping charges for getting the substrate in your hands, credit card percentages and of course a decent mark-up.
Award-winning author and international speaker Jimmy Lamb has more than 20 years of apparel decoration experience. He currently is manager of communications for Sawgrass Technologies, Charleston. S.C. For more information or to comment on this article, email Jimmy at jlamb@sawgrassink.com.
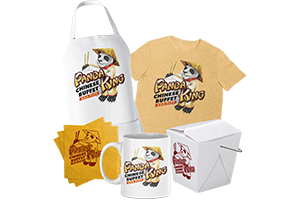
So, your customer returned again this year asking you to reprint their usual spirit-wear design for the upcoming football game. That’s great. But why stop there? Think of all the potential that exists for increasing your sales by taking that one design and using it to create an entire collection.
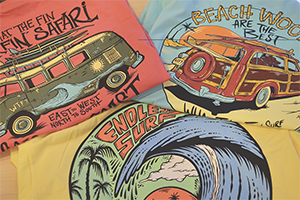
Many apparel decorators have decided to diversify their businesses, and with newer technologies being simpler to adopt, there are now more shops with more decorating choices available than ever.