Decorated-Apparel Transfer Printing with DTG
Today’s decorated-apparel professionals can dramatically expand their design and product offerings to include direct-to-film (DTF) with an existing direct-to-garment printer.
FULL STORY
Today’s apparel decorators are faced with more challenges than ever when applying heat transfers because of the wide variety of fabrics used in garment construction. Decorators are experiencing the frustration of heat printing on new synthetic fabrics that are being introduced to the market at unprecedented speeds.
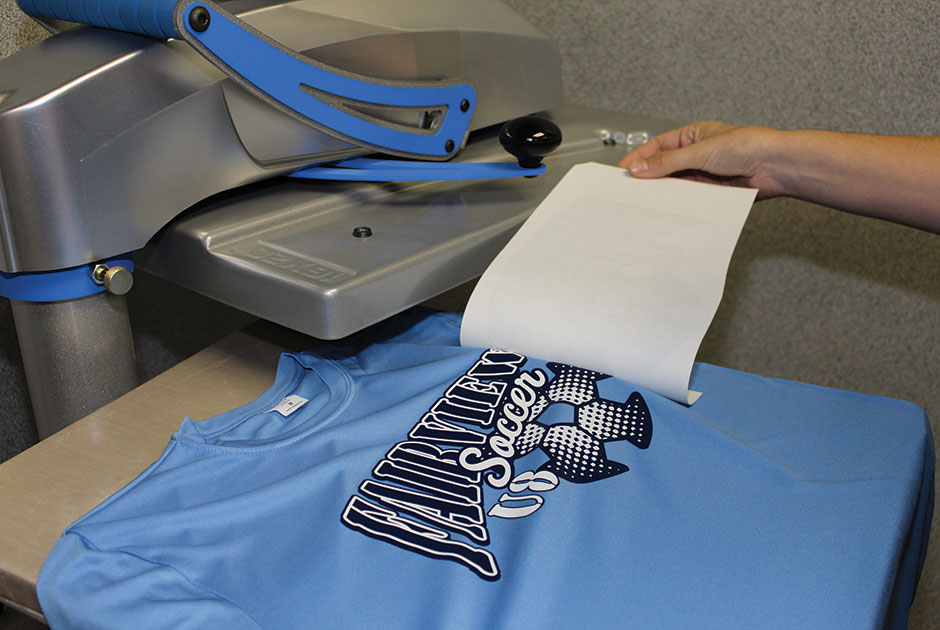
Luckily, today’s heat transfers are evolving to keep up with these changes in fabrics and garment trends. In addition, today’s heat presses also have evolved to keep up with the modern garment decorator’s needs. They are engineered with features like digital touchscreen controls, garment presets and digital pressure indicators.
Using a heat press with these new features, combined with today’s sophisticated heat transfers, gives decorators benefits they never had in the past.
Know Heat-Transfer Types
It’s important to pick a well-established transfer manufacturer and study its transfer options for each fabric type you’re decorating. In addition, get to know the customer service representatives, who will assist with explaining artwork options, pricing and selecting the best heat transfer for any given job.
Before choosing a transfer supplier, consult other garment decorators to get referrals. Ask them to rate aspects such as product quality, customer service and delivery. Remember, it’s not bad to pay slightly more for a heat transfer if you are getting a top-quality product, great technical support and speedy delivery.
The following describes, in general terms, the most popular heat-transfer types used by today’s garment decorators. Likewise, the application guidelines are general; always use your transfer manufacturer’s application guidelines for the product you are using.
Cold-Peel Plastisol: These transfers have been used since the late 1950s and provide a semi-gloss look that still is popular for team sportswear decoration and general use. They should be applied at 350˚F with medium pressure for 15 seconds and peeled after the garment has cooled. After pressing, rub the back of the paper with a cloth to help absorb the heat and speed up the cooling process before peeling. In some high-volume shops, the garments are set aside after heat pressing and the transfer paper is peeled later to help increase production speeds.
Hot-Peel Plastisol: These transfers can be heat-applied and the paper can be peeled immediately without waiting for the garment to cool. Some hot-peel transfers have a powdered adhesive applied to the back to speed up the transfer process. General application guidelines call for 365˚F using firm pressure for four to six seconds before peeling hot.
Hot-Split Plastisol: Developed in the 1980s, these transfers revitalized the heat-transfer market by providing a soft-hand print with a matte finish. They look and feel like direct screen printing and are popular among retailers due to the print’s soft feel. Hot-spilt transfers are ideal for burnout materials, tri-blends and womenswear that require a softer feel. General application guidelines call for 365˚F with firm pressure for eight to 10 seconds before peeling hot. After heat pressing and peeling, some of the ink remains on the paper, but the majority is transferred to the garment.
Heat Transfers for Performancewear: These transfers are fairly new to our market, so consult your manufacturer regarding the type of fabric you’re decorating. Not all manufacturers have a transfer suitable for polyester fabrics, so do your homework and select a company with a proven product. Special additives are mixed in with the transfer ink for decorating performancewear to allow for better stretch and to promote adherence to these fabrics. Some transfers can be applied at lower temperatures to reduce the likelihood of dye migration.
CAD-CUT Heat Transfers: A game changer for some garment decorators, these transfers provide a wide variety of heat-printing options, including vinyl, flock, glitter and more. CAD materials are designed and cut on a digital CAD cutter and heat-applied directly to team uniforms, hoodies and tees as an in-house decorating service. Advancements in CAD materials have made it possible for decorators to design and apply custom graphics to a variety of polyester materials, including some compression garments. Consult your CAD film supplier regarding the types of fabrics that you will be decorating.
Sublimation Transfers: These transfers are made to be heat-applied to 100% polyester fabrics. They are popular because they also can be made in house with an inkjet printer and special sublimation paper, with the graphic designed in the RGB color space. General application guidelines call for 390˚F-400˚F using medium pressure for 30-40 seconds. Remove the paper quickly to avoid “ghosting” around the image. It also is important to remember that sublimation transfers are not opaque and are intended for decoration on white or pastel polyester fabrics only.
Know Your Heat Press
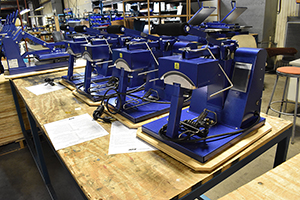
All heat presses are not created equal. Some manufacturers pay closer attention to detail than others, so select a brand that has a good reputation in the market.
The two standard heat element sizes are 15″ x 15″ and 16″ x 20″. If you’re in doubt about which size would be best, choose the larger one; you always can heat press smaller designs with a larger machine. For oversized garment decoration, heat presses also are available in 20″ x 24″, 30″ x 40″ sizes and larger.
Swing-Away or Clam-Shell: Another decision to make is whether to choose a clam-shell heat press or a swing-away model. A clam-shell design has hinges at the back and opens like a clam’s shell, as the name suggests. These presses are popular in retail stores since they take up less counter space and can be faster in production, as the heat element remains stationary.
Athleticwear and team-uniform decorators usually prefer swing-away presses because the heat platen can be moved in order to lay out player names and numbers on a jersey before heat pressing. Sublimation decorators also prefer this model because the heat element locks down horizontally, reducing the chance of the transfer slipping when heat printing thick items such as wooden plaques and ceramic tiles.
Air-Operated Automatic Presses: This heat-press type is considered the top-of-the-line. Air-operated heat presses offer superior downward pressure, minimal operator fatigue and precise repetition from garment to garment.
Helpful Tips
1. Choose a heat press that allows you to split or “dress” a garment over the lower platen to keep it from sticking together when applying graphics to the front and back.
2. Use a Teflon protector on the lower pad to allow for easy garment loading and reduced wear.
3. At the beginning of a production run, always preheat the lower platen by closing the machine for a minute or two. The heat element loses temperature on the first few cycles because the heat gets absorbed by a cold lower platen.
4. When applying cold-peel transfers, gently release the heat element when opening the press. This keeps the design’s edges from lifting, as the ink needs time to harden before the paper is peeled.
5. Plug the heat press into a wall receptacle with the correct voltage and amp-load requirements. Otherwise, it will not heat properly. Also, don’t use an extension cord, as the resistive electrical load will cause a fire hazard.
7. Pre-press your garment before applying a transfer to remove excess moisture for better transfer adherence.
8. When heat pressing dark-colored garments, place a Teflon or slip sheet over the transfer and garment to keep the dye from getting on the upper platen.
9. When testing a new transfer, you can cut it in into quarters to avoid wasting multiple transfers.
10. Periodically check the heat platen’s temperature with a digital surface pyrometer. This is the best device to use because its probe comes in direct contact with the heat element.
James Ortolani has more than 30 years of experience in the decorated apparel industry, specializing in hands-on direct screen printing and heat-transfer production. He currently works for PolyOne Corp. For more information or to comment on this article, email James at james.ortolani@polyone.com.
Heat Press Add-Ons
A heat press is ready to use right out of the box without accessories, but there are many add-on items that make this decoration process easier and more efficient. These items include lower-pad protectors, interchangeable platens, Teflon sheets, laser-alignment systems, lettering guides, heat-press stands, shirt caddies and more.
Today’s decorated-apparel professionals can dramatically expand their design and product offerings to include direct-to-film (DTF) with an existing direct-to-garment printer.
FULL STORYIn Parts 1 and 2 of this three-part series, we talked about how the three main variables in heat pressing are temperature, time and pressure. We then went on to look at what to look for in a heat press to ensure you meet these conditions consistently.
FULL STORY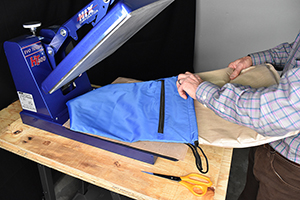
In Part 1 of our three-part series on heat presses, we looked at the basic design types and features apparel decorators want to keep in mind when considering a new system. In Part 2 we look at speciality presses for decorating caps and applying shirt labels, and also multi-function presses
FULL STORY