Decorated-Apparel Transfer Printing with DTG
Today’s decorated-apparel professionals can dramatically expand their design and product offerings to include direct-to-film (DTF) with an existing direct-to-garment printer.
FULL STORY
A fun project you can tackle with your DTG is to brand your own line of shirts. Removing the existing label and printing your own custom logo or your customer’s logo in its place can give shirts that special touch.
First, you will need to create a “riser” platen to print inside the shirt (Figure 1). A simple 2.25- to 2.5-inch square of thick cardboard or plastic will do the trick. We used a 3/16-inch thick piece of plastic for our riser and taped it to the top of our platen in the center from side-to-side. This made aligning the artwork much easier.

Figure 1
We designed our label and placed it in the print software in the same position on the platen as the riser (Figure 2). Since we placed the riser at the top edge of the platen, we positioned the artwork within that same square area. To make it easier, make the artwork smaller than the riser. This will allow room for error in positioning of the shirt and artwork.

Figure 2
You can easily test the positioning of your riser and artwork by placing a piece of paper onto the riser and running a test print. If your image prints off of the riser, adjust accordingly. You don’t want your label accidentally printing onto the collar of your shirt.
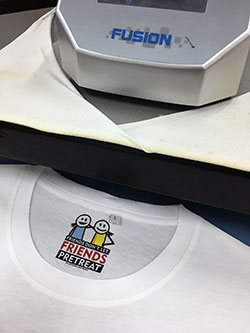
Next, we removed the label and heat pressed the shirt flat (Figure 3). Then we loaded the shirt by laying it on top of the platen and in position on top of our “riser.” We made sure that any other labels and the collar were below the top of the shirt sitting on the riser. It’s important to eliminate any chance of a label or bump in the fabric to come into contact with the print head during printing.

Figure 3
Once the print was done, we removed the shirt and heat cured the inks, making sure to not use excessive pressure and that the shirt was still flat. Heat pressing wrinkles into the fabric will result in unsightly creases and make it more difficult if you need to do any additional printing.
Using risers also can make it much easier to do other types of prints. For example, you can position your riser on the left side of the platen at about pocket height. You can then load a pocket shirt so that the pocket lies just below the riser. using the top of the pocket sitting just off and below the riser. This will allow you to easily print just above the pocket on a shirt, with perfect alignment every time.
Brian Walker has owned his own screen printing business, developed quoting and pricing software and also launched a successful online direct-to-garment equipment and supply business. He currently is president of i-Group Technologies, makers of Viper pretreatment machines for the direct-to-garment industry. For more information or to comment on this article, email Brian at brian@igrouptech.com.
Today’s decorated-apparel professionals can dramatically expand their design and product offerings to include direct-to-film (DTF) with an existing direct-to-garment printer.
FULL STORYThe past few years have brought changes to almost every industry, and decorated garment production is no exception.
FULL STORY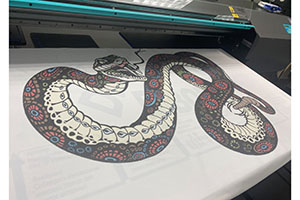
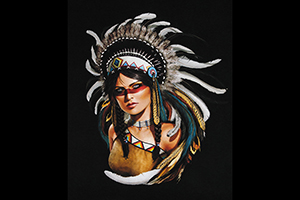
New Jersey-based Breakthrough Custom Clothing created “Warrior Princess” from scratch by digitally hand drawing the entire piece.
FULL STORY